Chimney Repointing
Chimney repointing is an important component of chimney maintenance and fundamental for keeping your chimney safe and in good working order. Like all the exterior brickwork of a building, chimney masonry can deteriorate over time. Sitting at height on top of the property a chimney is exposed to the elements; wind, rain, and temperature taking their toll. The mortar between the bricks will, over time, begin to ‘weather’ away. If left too long it will crack and water will be able to leak through.
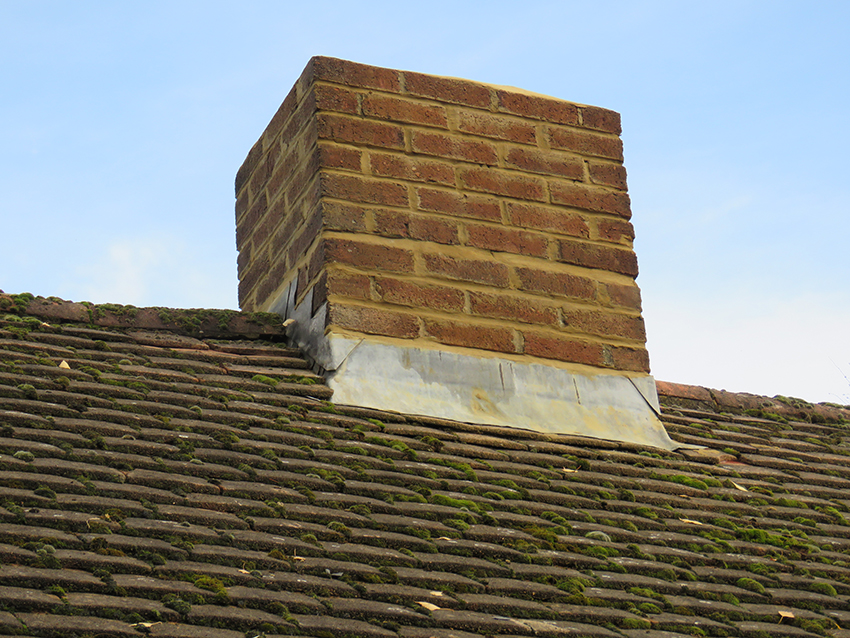
In a chimney, water ingress can result in all kinds of problems. These include inefficient expulsion of the gases and damage to the interior of the home, to weakening the structure causing the chimney to collapse. All these problems can be very expensive to fix, so keeping the brickwork in good order is not only cost-effective but gives you peace of mind that your chimney is in a good, safe condition. In this article we look at chimney repointing as part of your chimney maintenance regime. We will look at what is involved and the benefits of having professional chimney repointing.
Do I need my Chimney Repointing?
Firstly, you need to know if work needs doing. If you have your chimney regularly maintained with a company like Billing Chimneys, this will be done for you. Anyone inspecting a chimney will be looking closely for visible signs that there may be issues. These issues include cracks in mortar or the bricks themselves. Change in the colour of the mortar is another indication that there could be an issue. Flaking of the mortar and spalling of the brickwork is also looked for. Spalling is where you see cracking or flaking on bricks.
Given that a chimney is high, inspections can be difficult, so methods other that a visual examination may be needed. Depending upon the position of the chimney in relation to the building, a ladder could be used. Modern technology can also be used, drones for example can aid the assessment of chimney masonry, allowing for close inspection without the need for climbing.
Signs on the inside of the building include water or damp in the roof space. There could be signs of damp on ceilings and discolouring of walls or wallpaper in rooms the chimney services or where the flue passes. Lower down the flue, there could be rust on the firebox.
Signs of problems with chimney masonry
- Cracks in mortar
- Discolouration in mortar
- Flaking mortar
- Spalling (flaking away) of bricks
- Rust in the firebox
- Damp in the roof space
- Damp ceilings and walls
- Discolouring of wallpaper
- Water ingress presenting on the register plate or within the fire recess
What is the chimney repointing process?
The first thing to remember is that chimneys are high on a building, so anyone attempting to repair a chimney needs to be competent and aware that working at height can be dangerous.
The starting point in the repointing process is a close inspection of the condition of the bricks and mortar. This will ascertain the extent of the problem and if there are issues other than age, wear and tear, and weather that may have caused the damage. This will enable the job to be planned, what materials will be required and an approximate timescale.
The building as a whole will be looked at. Experienced chimney technicians will want to ensure that any new work blends in with the existing bricks and mortar, otherwise the finished job could stand out and look odd. Having professional chimney repointing will avoid pitfalls like this and ensure a complete job. Professionals will provide a report on what their inspection found. It will explain the chimney’s condition, what needs to be done and a close estimate of the cost. Having a good quality, professional job means the chimney will be good for at least another thirty years.
It is likely that scaffolding will be used for the technicians to work safely. Covers may also be required, depending upon what lies beneath the area where the work will take place.
Another important consideration is when to carry out the work. The weather can seriously affect the integrity of the mortar. If there is frost the mortar mix will not set properly. It will freeze and then crack and fall out. Similarly, if the weather is very hot, the mortar can crack. A competent contractor will have an eye on the weather forecast and work will not take place if the weather conditions threaten the quality of the finished work.
Once work commences, the old mortar is chipped away using a chisel. A small chisel will scrape away loose old mortar but a larger chisel, along with a hammer might be needed for tougher mortar that needs removing. Removing the damaged and old mortar exposes the brick ends and creates room for the new mortar. If any of the bricks have spalled, these will need replacing. This will be dealt with first. Before applying the new mortar, the area should be brushed of all dust. Any debris is cleared away and the existing mortar prepared to ensure the new mortar fixes well.
Once the chimney masonry has been prepared it is time to fill in the joints. The new mortar will be pressed into the spaces between the bricks called joints. The bricks need to be dry and the mortar of the correct consistency. Having the mortar too sloppy will make it difficult to use and too stiff will make a mortar prone to crumbling.
Appropriate mortar should be used, matching the existing pointing as much as possible. It’s usual with repointing to work from top to bottom. The horizontal, or ‘bed joints’ are filled first, then the vertical or ‘head joints’ are filled. To ensure a neat job, the mortar is left until almost dry then any excess mortar is brushed away.
When finished, the look created is down to the style of the building and ensuring the new work matches the existing brickwork. As well as the colour, the shape of the mortar should match the existing mortar. Achieving this in the repointing process is down to the skill and experience of the technician.
There is bespoke method of pointing called tuckpointing. This is a specialised method of repairing brick mortar and involves the illusion of narrowing of the joint. Here the mortar is matched to the bricks. Once applied, a groove is drawn centrally in the new mortar and a contrasting mortar is pressed, or tucked, into the groove. Your chimney repointing contractor will have discussed methods with you following their initial inspection.
A range of tools is needed when repointing brickwork:
- Mortar – (usually cement, lime, and sand)
- Cement mixer
- Covers
- Chisels
- Hammer
- Wire brush
- Soft brush
- Mortar board
- Trowel
- A pointing or mortar gun can also be used
What are the benefits of chimney repointing?
It is inevitable that over time the mortar of chimney masonry will deteriorate. A chimney top by nature is exposed as its job is to safely expel the gases caused by burning fuel. Weathering from wind, rain, and sleet will, over time, erode the mortar. Frost, especially if the bricks or mortar are wet, is a particular hazard. Cracks, leaks, and water damage in a chimney can cause a range of issues. The good news is a good chimney repointing job will last for many years, so it is a sound investment for the efficiency of the chimney and for chimney safety.
Professional chimney repointing can pay dividends. Once completed, you can be assured that the mortar of the chimney is sound and that water ingress via the brickwork has been eliminated.
A chimney is often part of the charm and character of a house. It stands out, people notice a chimney if chimney repointing has been done poorly, so a good quality repointing job adds to the aesthetic appeal of the property.
Finally, good chimney maintenance will ensure that your chimney works safely and is energy efficient providing that cosy warmth and ambience desired of the fireplace.
What about chimney repointing costs?
It is difficult to provide a ball-park cost. The cost of professional chimney repointing depends upon a range of factors. These include the size of property, the location of the chimney on the property, the age of the property and the existing condition of the chimney. The costs are generally made up of labour, materials, scaffolding, or a scaffold tower.
It is, of course, possible for DIY chimney repointing though you will need to be aware of the work involved and ensure your safety when working at height.
Your situation, and chimney, are unique to you so acquire a quote from more than one company. Providing quotations is part of the normal process for a contractor and they will know that customers have sought other opinions and costs. By obtaining quotes from reputable companies, you can be assured of a professional chimney repointing job that will last many years.
DIY chimney repointing vs. hiring professionals
For anyone considering undertaking their own chimney repointing it is important to take many factors into consideration. Carrying out this kind of work takes skill and expertise. Even mixing the mortar itself is important. Too strong a mortar can also damage the bricks. Any cracking in the mortar indicates that the mortar applied was too strong.
If you have experience in the repointing process, then DIY may be for you, but don’t forget, you will need to ensure your safety when working at height. The biggest plus is probably in cost. Depending upon the location of the chimney you will likely still need to hire scaffolding. You will need the correct tools and other equipment. The biggest saving is obviously on labour. Generally, professional chimney repair is carried out by at least two operatives to ensure safety. It would be wise to consider having help from a competent person if you intend to carry out DIY chimney repointing.
Whilst hiring professionals will cost more, there are a range of guarantees. The initial inspection will have identified all issues, for example, why water is getting in if it’s cause isn’t simply age or general weathering. The job will be carried out by technicians who are experienced and will match mortar, ensuring the job not only solves the issues you are having but is also aesthetically pleasing. Professionals have all the correct tools and will understand that the work needs to be carried out under the correct conditions.
What chimney maintenance will be needed after repointing?
If the repointing job has been carried out correctly, little maintenance will be needed. A good professional company will clean any loose mortar as soon as the mortar has gone off, leaving the bricks clean. Provided the correct mortar mix has been used and the work carried out under the right conditions the mortar will last in-situ for many years.
If you have a chimney that is in regular use on your property, then you should have a regular maintenance routine. Sweeping and an inspection will include an inspection of the condition of the brickwork that is open to the elements. Frequency of inspections will depend upon the amount of use the chimney gets. The location of the property and its position will have an impact on the amount of weathering it is affected by.
Chimney repointing on historic buildings
With all repointing, it is essential that the new mortar matches in colour the building’s existing mortar. When repointing a historic or listed building all repair and renovation work must be like for like, so any repointing must create the same finish as the rest of the brickwork. Care must also be taken to replicate how the mortar is applied. We have already mentioned tuck pointing but there are other styles which dictate the shape of the edge of the mortar.
Pointing Types
- Flush – The most common, creates a straight edge
- Keyed – A concave curve
- Tuck – Putty placed into a groove in mortar, created prior to the mortar setting
- Struck – Sloped with the top slightly further back than the bottom
- Overhand struck – Sloped with top slightly further forward than the bottom
- Beaked – Where an outward point is created
Pointing historic and listed buildings to the correct standard is a skilled job and it is recommended that this job is carried out by professionals such as Billing Chimneys.
Finding the right chimney repointing contractor
Engaging a professional chimney pointing contractor is the best way to ensure that the chimney repair is carried out correctly, ensuring the job will last for many years.
Like most jobs we need doing by others on or in our homes, we want to be certain that whoever we choose will do the job we want to a high standard and be good value for money. We want the job to go as smoothly as possible and the contractor to communicate well. One of the best ways is to seek recommendations, check independent reviews and look for professional qualifications and experience.
A good contractor will be happy to provide a quote and will be aware that you will be seeking quotes from other companies. A good contractor will be happy with that and not try to persuade you against this action.
A good contractor’s quote will be clear and concise, so you know exactly what will happen during the repointing process and the costs involved.
Check how much experience the contractor has. For example, Billing Chimneys are chimney specialists working in the trade for over forty years. And check other credentials, such as accreditations and membership of organisations that ensure quality of work. For example, Billing Chimneys is HETAS registered (Heating Equipment Testing and Approval Scheme). We are also members of NACE (National Association of Chimney Engineers) which was established to protect and guide consumers.
Chimney repair checklist
- Get recommendations
- Check if the contractor is insured
- Look at reviews
- How experienced are they?
- Check Credentials
- Get at least three quotes
- Ask for a written quote and read their terms and conditions
The right people for your job
Keeping your chimney well maintained is the best thing for your safety and the efficiency of your fire or appliance. It is also a prominent feature of your building so an integral part of its appearance. Keeping it in good condition is essential and chimney repointing, when it is required, is part and parcel of your chimney maintenance routine. Luckily, once a chimney has been repointed the work should last for many years.
Billing Chimneys are chimney specialists with over forty years of experience. We provide high-quality workmanship carried out by experienced technicians and are confident that we are competitive. With many happy customers we are a go-to company for when you need professional chimney repointing.
Fireplace canopies are an instantly recognisable feature of an open fire. Their purpose is to direct smoke up the flue, allow heat to fill the room and prevent heat damage to the mantel and anything above it. Dealing with fireplace canopies is part and parcel of our everyday work here at Billing Chimneys and in this article, we will explain more about them and how to choose the perfect canopy for your fireplace.
Types of Fireplace Canopies
The two main types of fireplace canopies are hood canopies and flue canopies. Hood canopies are simply attached to the top of the fireplace opening and are usually fitted to smaller fireplaces.
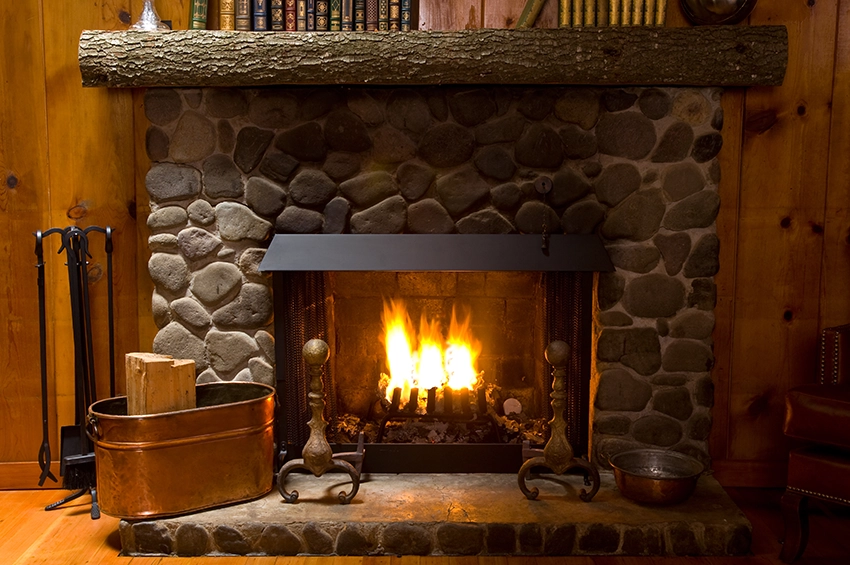
Hood canopies can also be called smoke canopies. They can be made of various metals, including copper, cast iron and steel. They are widely available and come in a wide variety of styles from period to modern. The simple panel deflects smoke and heat back into the flue. They can prevent heat damage to the mantel and prevent smoke discolouration. They are generally available in sizes 16” (40cm) and 18” (45.5cm). There are some expandable types, allowing for a wider or narrower placement.
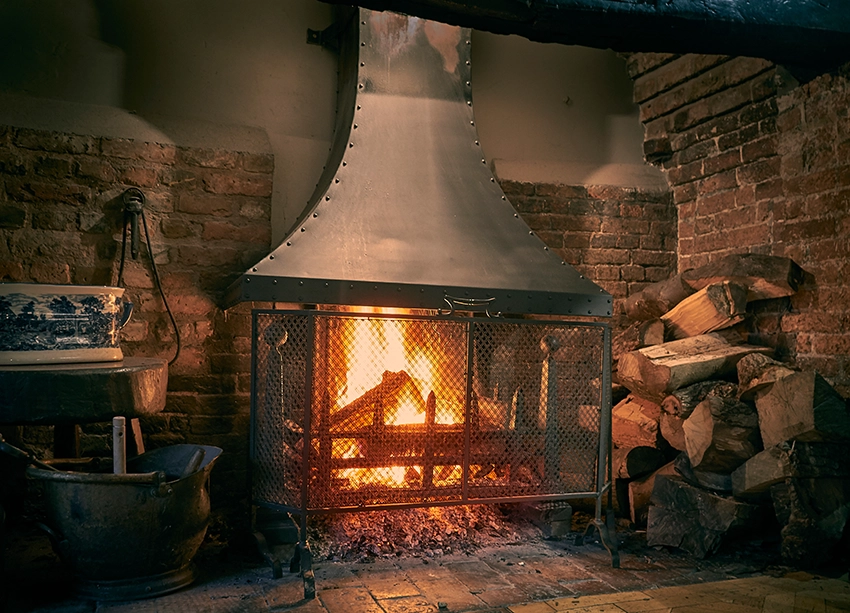
On larger fireplace openings, such as inglenook fireplaces, fireplace canopies can be found inside above the firebox. These canopies help with energy efficiency by directing the smoke and gases into the flue rather than filling the large aperture. Because of this, more of the heat from the fire fills the room. As with hood canopies, fireplace canopies can be made of various metals and designs.
How do they work?
Both hood canopies and fireplace canopies are designed to draw the smoke and gases caused by burning away from the firebox and into the flue. Hood canopies deflect smoke back into the firebox whilst fireplace canopies help draw the smoke and gases up into the flue. Both types of canopies can increase the draught of the fire, making it burn efficiently.
Benefits of Fireplace Canopies and Hood Canopies
Fireplace Canopies
- An integral part of the chimney
- Prevent heat damage to the outside of the fireplace, including mantels and anything above
- Improve draught
- Aesthetically pleasing
- Reduces the flue opening in large fireplaces
- Add to the attractiveness of the fireplace
Hood Canopies
- Prevent heat damage to the outside of the fireplace, including mantels and anything above
- Can improve draught
- Readily available and easy to fit
- Can be an attractive feature
How to choose fireplace canopies and hoods
The choice of fireplace canopies and hood canopies varies from a basic, simple steel hood that is mounted outside the firebox and widely available, to a bespoke, purpose-made canopy that fits over the firebox. There is a wide variety of designs available, from modern to vintage, reclaimed to bespoke. The choice is limitless and the type of canopy or hood suitable for your needs depends upon your project, the size of the fireplace and your budget.
Take time to consider the look you are trying to achieve for the whole room. An open fire provides ambience as well as heat. How are you decorating the room? Modern, cosy? The materials you choose for the canopy or hood can form part and parcel of the overall design. Hoods can be bought in many styles, including Victorian or Art Nouveau. Will you want it shiny or muted? You could have reclaimed or reproduction or there are companies who manufacture fireplace canopies to order. It all depends upon your budget.
Size is important too. If a canopy is too small it might not do its job, if it’s too large, it could spoil the look of the fireplace by appearing out of proportion. If you need help in getting the correct canopy for the size of your fireplace, Billing Chimneys’ staff are here to assist.
If you are renovating your property and are looking to open previously unused chimneys, then do look at our article on this. You can find it here: Fireplace Renovation additionally if you have a period property there you might also find this article helpful: Fireplace Restoration in Period and Heritage Properties.
Engage experts for a professional installation
The most important part of having a new canopy is correct installation. It will be of no use if it is poorly fitting, as it will leak smoke and heat and defeat its purpose. Engaging chimney specialists like Billing Chimneys will ensure the job is done correctly and the canopy is working efficiently.
Fireplace canopies are a beneficial part of a fireplace when it’s used as an open fire. They can help keep smoke from getting into the room and keep heat in. They can also provide an additional feature for your room’s décor. If you are having issues with a canopy, need advice on getting a new canopy or wish to change an existing canopy, then call in the experts, Billing Chimneys.
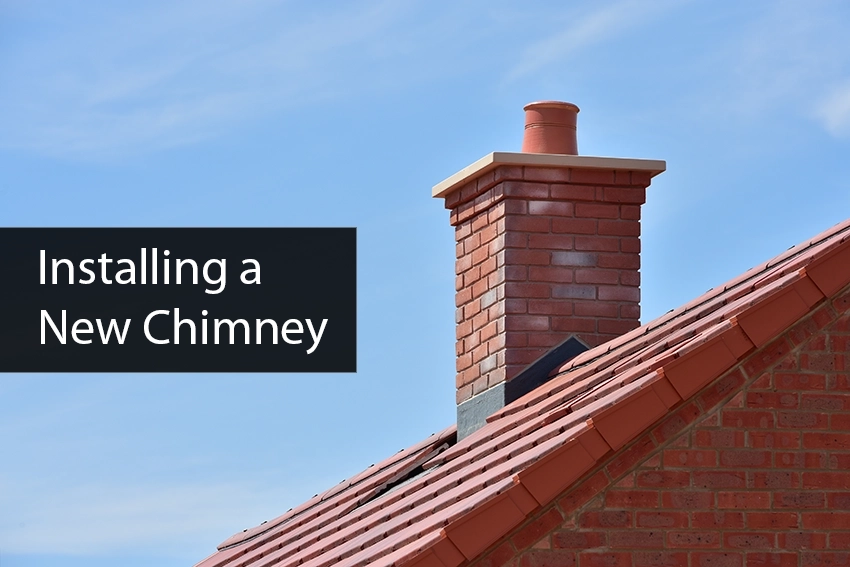
Do you live in a home that has no fireplace? Do you wish sometimes that you could enjoy a cosy real fire? Maybe you thought about the possibility but imagined that this might not be an option. In this article, we look at installing a new chimney from scratch, whether it is possible and if so, how to go about it.
Prior to the advent of central heating, homes were built with a chimney so that they could be heated by a fire. Most people burnt coal, but as populations grew and towns become more populated, the emissions badly affected air quality, resulting in deadly smog. To counter this, the Clean Air Act 1956 was brought into force. Following this, many new homes were built without chimneys having instead central heating fuelled by gas, electricity, or oil.
One of the drawbacks was the lack of a focal point, particularly in the main lounge. Alternatives have included gas and electric appliances with fake flames. Woodburning stoves are also a choice, but some people miss the warmth and comfort provided by a real living fire. For a real fire, you need a chimney.
Installing a new chimney – is it possible?
The answer is – yes! Billing Chimneys has installed chimneys on all kinds of properties and whilst it’s usual for them to be included on a new build or reconstructed as part of the renovation of an existing chimney, it’s certainly possible to have a new chimney built onto a home currently without one.
As with all work on chimneys, you need to get expert advice before you begin.
What to consider
Cost
Think of installing a new chimney as if purchasing a new appliance. You would want the appliance to fit into the design and layout of your home. You want it to be safe and reliable and you want it to be energy efficient. The cost of installing a new chimney from scratch will depend upon the scope of the work. Think carefully about the look you are trying to achieve for your home as this will affect the materials needed and overall cost. Also, a chimney is a long-term investment.
Upheaval
It will be necessary to break through an external wall to connect the hearth with the masonry flue. This is a major building job and can cause upheaval to the household. If the work is part of a renovation and the property is empty, then it will be part and parcel of the whole work. If you will be living in the house when the work takes place, it will be disruptive. However, this can be kept to a minimum by engaging experience chimney specialists, such as Billing Chimneys.
Planning and building regulations for installing a new chimney
Planning Permission
If you are having a new chimney stack constructed onto your home where none has previously existed, then planning permission will be required. There are some rules on permitted development and on where the chimney stack is to be positioned on the property.
Building Regulations
Building Regulations are about safety. It is extremely important that any new chimney stack meets all the necessary Building Regulations as a badly constructed chimney stack will most certainly be dangerous. There are structural requirements and rules on distance from other buildings that will need to be considered.
Conservation areas
Where a property is located within a conservation area, there may be local rules on development, and you will need to check with your local authority if there are any restrictions.
In each of these instances, it is advised you check planning and other permissions in the very early stages to prevent possible delays or additional expenses later. As you can see, it is best to get professional advice at the outset and Billing Chimneys staff can help with this.
Types of property and installing a new chimney
Pre 1960s properties
It is most likely that properties built prior to 1960 will have a chimney. If there has been a chimney previously it may be that only some part has been removed. It may not need a new full chimney and stack. The best way to find out is by having a survey done and an inspection of any remaining chimney structure.
Post-1960s properties
Those properties built since the Clean Air Act are the ones likely to be without a chimney stack and it is commonly these homes where the owners are seeking to add this attractive feature. It is possible to install a new chimney subject to the planning rules and building regulations mentioned above.
Listed and Heritage Buildings
Whilst listed buildings tend to be of age, and therefore built when chimneys were needed, it is not impossible for a building without a chimney to be listed. You will know whether your home is a listed building, so to have a new chimney added would need Listed Building Consent as well as any other planning consents. You can read more about works on these buildings here: Listed Building Consent and Chimney/Fireplace Works
Leasehold Properties
If your property is leasehold, there may be restrictions on what development you can undertake. You will have a lease and your property may be subject to a covenant. You will need to check these with your freeholder before any major works, such as installing a new chimney, are undertaken.
Designing your new chimney
We’ve looked at the importance of ensuring you have permission to install a new masonry chimney. Once this is assured you can begin your project in earnest. Engaging experts in the field like Billing Chimneys can save time and effort from having to look for more than one contractor as we can undertake the job from start to completion.
You will have looked at ideas for style and materials and what you envisage. Not only for the internal look of the new chimney breast but also the new masonry chimney and stack on the outside. It is exciting to see what your new chimney would look like and there are computer programmes that allow designers to create realistic images. However, what you initially imagine may not always be possible. When installing a new chimney, there may be constraints on the type of brick that you can use, and this would be stipulated in the planning stages.
If you have a designer working for you, then they may find it helpful to consult Billing Chimneys and take advantage of our chimney design consultancy. When designing your new chimney, you will need to consider the character of the house. Whilst it could be a new feature, there are planning rules affecting positioning. New chimneys are usually placed at the side or back of the property.
The height of the new chimney is also restricted by the regulations as is the position in relation to neighbouring properties. See our Chimney Height article. All these are considerations at the design stage when installing a new chimney.
Building your new chimney
From design to choosing an appliance and everything in-between, Billing Chimneys are the experts to call.
Permissions are all in place, the design has been agreed and a great contractor like Billing Chimneys has been engaged. It’s all systems go for installing your new chimney. These are major works, so they will entail some disruption.
Foundations will need to be dug adjacent to the outside of the wall where the chimney is to be placed and infilled with concrete. Your local authority Building Control will need to approve the foundations before the masonry work is begun. The chimney will be constructed to the design brief however, it will need to meet all regulations on size. The masonry will also have a damp-proof membrane and be tied into the existing wall.
The other major task when installing a new chimney is to knock through the wall where the new hearth will be to meet the flue on the inside of the chimney. You will need the wall strengthened with a lintel and the floor of the foundation and the inside of the building need to be made level.
Sections of a chimney
A masonry chimney is built of bricks, but there is more to a chimney than the flue and the fireplace, the chimney is the whole structure.
A masonry chimney will need lining. This is to prevent damage to the bricks and mortar and to prevent leaks of the gases that travel up and out of the flue from seeping into the building. We have an article about linings here: Flue Lining. Billing are experts in chimney lining and when our customers are installing a new chimney we will advise on the most suitable liner. See Chimney Liner Installation.
At the top of the chimney, where it meets the roof, flashing will be installed around the stack to ensure there is no leakage of water into the roof. At the very top of the chimney will be a chimney pot and this should be topped with a cowl. Cowls prevent problems with debris falling down the chimney and they can prevent birds from nesting.
The hearth is inside the house, and this holds the firebox, damper, and smoke shelf. These components are important for the draught which helps the fire burn and carries out the gasses formed by burning. The damper also closes the flue to prevent draughts when the fireplace isn’t in use.
Notice Plate
When your new chimney installation is complete your installer will provide and fix a Notice Plate. The notice plate contains essential information, this includes:
- Location of the beginning of the flue, hearth, or firebox
- Category of flue and generic types of appliance that can safely be installed
- Type and size of flue, any liners, and manufacturer’s name
- Installation date
Notice plates should be placed where they can easily be found and referred to. They must be fixed securely, made to last and the text should be permanent. Good places to attach a notice plate are beside the water stopcock or the electricity consumer unit.
Notice plates provide information for future care, maintenance, repairs and alterations.
Main parts of a chimney
- Chimney – the whole structure
- Flue – where gasses form during burning rise and escape. A chimney can have more than one flue
- Chimney Stack – The part seen above the roof
- Chimney pot – on top of the stack, usually but not exclusively terracotta
- Cap – for unused flues
- Cowl – installed to prevent nesting and debris getting into the flue
- Chimney Breast – is inside facing the room
- Mantle – the shelf over the chimney breast
- Hearth – the floor of the chimney breast
- Firebox – area where the fire is lit
- Damper – structure inside the flue to stop draughts when the fire isn’t being used
- Smoke shelf – collects rain and debris and prevents downdraughts
- Smoke chamber – directs smoke and gases up and out of the flue
As you can see, there is more to a chimney than at first meets the eye and it’s important that each component plays its part. Burning of fuels creates gases and these need to escape safely so as not to escape into rooms and cause harm.
The Importance of the build quality
If your new chimney has been well built it could last a century! One of the things we at Billing Chimneys put above everything else in our work is safety. A quality build will have adhered to all current building regulations that have been developed with safety at the core. If your chimney has been well built, there should be few if any problems for many years, but it will still need regular sweeping and inspections of the inside of the flue and the stack. It is important that the chimney is kept clean and well maintained and Billing Chimneys can help you do this.
The new chimney sits very well on the house, my thanks to Tony, Trev, and Russell for their expertise in achieving this end. Mr P Gorley
Aftercare
You now have your new chimney installation and you’re sitting beside a roaring fire. This is not the end of having a chimney, there are responsibilities in having this new and attractive focal point in your room.
Regular Maintenance and Inspections
At the very start with a new chimney installation, you will learn that part and parcel of having a chimney is keeping it maintained. With a new, well-built chimney there will be few if any problems for many years but, like any other appliance, it will need care and maintenance. Chimney maintenance is important for both safety and efficiency. We recommend that a chimney should be inspected and swept annually. If a chimney is in regular use, it may need sweeping twice a year. Billing Chimneys offer reactive and proactive chimney maintenance services and you can read more about this here Chimney Maintenance.
As part of keeping our services the best and most efficient around, Billing Chimneys carry out inspections of flues using state-of-the-art CCTV. Stacks, including flashings, are now inspected using drones, please see Chimney Drone Inspection.
Safety is key
To stress the importance of this we have some articles about chimney safety. You can read them here: Chimney Safety, and Carbon Monoxide Poisoning.
Alternatives to installing a new chimney
If you have read all this and concluded that having a new chimney installation would be too disruptive, expensive, or simply not for you, there are alternatives to an open fire. One that has become popular recently is having a wood-burning stove installed. This is another of Billing Chimneys’ expert and quality services. You will find a lot of information on installing wood-burning stoves on our website. See:
- Wood Burning Stove Installation
- Installing a wood burning stove without a chimney
- Choosing a wood burning stove
Billing Chimneys’ business is based around chimney construction, and we are experts in the field. By engaging Billing Chimneys for installing a new chimney you have people on your side who know what to do from your first ideas to lighting your first fire. If you dream of having a brand-new chimney and hearth, then why not get in touch and see if that dream can come true?
Chimneys appear to be simple structures comprising a hearth on the inside of a building and a stack visible from the outside, but they are made up of several parts one of which is a chimney damper. In this article, we look at chimney dampers, what they are and why their correct use is important.
What is a chimney damper?
A chimney damper is a plate of metal, often made of cast iron, steel or other heat-proof material, that can be pulled up or down to open or close the flue. Opening and closing the chimney damper controls the airflow, regulating the draught. When a fire is lit, the damper must always be open to allow gases to escape. It can be closed when the fire is not in use to prevent heat loss from the room and to prevent cold air from blowing down the flue.
It is a good idea to think of your chimney as an appliance. It is there as part of the heating system of your home. When used as an open fire to burn wood or solid fuel, a good burn is achieved through the power of the draught. The draught is also most important to ensure the gases created during burning are taken up the flue and expelled out. However, most chimneys, especially domestic chimneys, are not lit all the time. A consequence of this can be a cold draft blowing down the flue and into the room. This is where a chimney damper comes into use.
Where is the chimney damper?
There are two positions in a chimney where you might find the damper. The most common is in the throat, which is a position just above the firebox, or where burning takes place. They are close enough to the hearth, or fireplace to be seen by looking up the chimney. The damper is open if, when looking up the chimney, the flue is visible.
The other type of chimney damper is a top-sealing damper, sometimes known as a chimney cap damper or top-mounted damper. As you would think, these are located at the top of the chimney stack. They have the same function as one located at the throat, regulating the airflow. A top-sealing damper has a rubber seal making it airtight, so it also has the benefit of preventing rain, wildlife, and debris from entering the chimney.
How do they work?
Both types of damper are opened and closed manually with a mechanism in or close to the fireplace. Throat dampers are operated with a handle. These vary from a ‘saw’ style or a poker type which attaches to the damper and are either pushed or pulled. Alternatively, there are rotary-style handles that are turned as you would a key to open or close the damper. With a top-sealing damper, the mechanism to open and close the damper is by a handle, usually at the side of the firebox. The handle is attached to a steel cable that reaches up the flue to the damper.
The position of the chimney damper should always be checked before lighting the fire. It is important that the damper is fully opened before starting the fire otherwise smoke and gases will be expelled into the room. Burning wood and solid fuels creates carbon monoxide, a poisonous gas, so it is imperative that the damper is open and the chimney is in good order when using a fireplace. Any closed, or partially closed damper will restrict the flow of these gases and can be injurious to health. You can read our article for more information about Carbon Monoxide.
What type of chimney damper should I have fitted?
If you have a chimney, you will already have a damper as they are part of a chimney’s construction, and it is likely to be a throat damper. If there are issues with the damper, then you could choose to replace it with a top-sealing damper.
Pros and cons of throat and top-sealing chimney dampers
Throat damper
Pros
- Easy to use
- Easy to control
- Helps retain heat in the room
Cons
- Metal on metal, so not a full seal
- Can warp over time
- Can rust over time
Top-sealing damper
Pros
- Airtight
- Energy efficient
- Keeps rain, debris and wildlife out
Cons
- Can only be fitted on masonry chimneys
- Can only be fitted on open fireplaces
- Access is via the roof only
Do I need a damper for my wood-burning stove?
Modern wood-burning stoves do not usually need a damper because they are designed to be efficient in expelling the gases of combustion. Older models may well have a damper to help to control the airflow. These would be in the stove pipe. Where there is no damper, some older models may benefit from having a damper fitted. If your wood-burning stove is not working to capacity and you are having issues, then it is a good idea to have the stove inspected.
Billing Chimneys has years of experience in wood-burning stove installation and can help you achieve optimum efficiency in your stove. Our expert engineers will be able to tell you if a damper would help or if there is something else that is interfering with the system.
Cleaning and maintenance of a chimney damper
As with everything associated with a chimney, keeping the chimney damper clean and well-maintained is essential for it to work safely and efficiently. It goes without saying that the fire must be out and the firebox completely cold before attempting to do any cleaning inside.
It is possible to remove, clean, and replace the damper plate if it’s a throat damper. There are nuts that when undone will allow for the rod to be removed and the plate lifted out. If it’s cast iron, it’s likely to be heavy, so care must be taken. When it’s out, check it for warping and rust. The plate can then be cleaned by brushing to remove soot and any creosote burned onto the damper.
With top-sealing dampers, because they are made of steel, rusting is unlikely. The cable may need replacing or debris removed from on top of the plate. However, maintaining a top-sealing damper will need access to the roof and is best left to professionals like Billing Chimneys.
Whatever you choose to do, cleaning and maintaining your chimney damper is a messy job, so why not call in the professionals? Billing Chimneys offers a full range of maintenance and repair services carried out by experienced and friendly engineers.
Your chimney damper is an important part of your chimney’s system and ensuring it is in good working order will provide your home with warmth alongside optimum energy efficiency. If you have any questions or concerns about your chimney damper, give us a call.
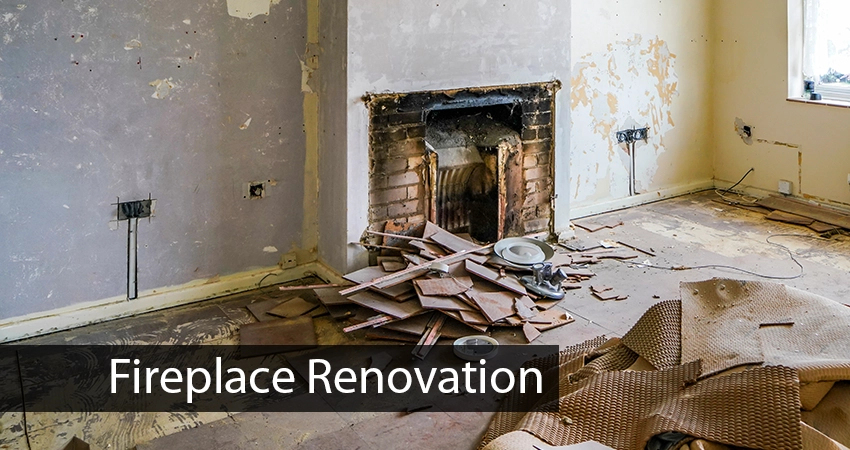
Do you have a disused fireplace at your property and are looking to open it up to be used again? Or are you thinking about updating your existing one or changing from an open fire to an appliance? Then you’ll be considering undertaking a fireplace renovation project. There is no doubt that fireplaces provide a superb focal point in a room and if the fireplace is in the main living area of your home you’ll want it to not only be functional but to look attractive. When it comes to fireplace design your options are limitless, however, there are some things that you must consider whatever type of project. In this article, we take a look at fireplace renovation, the things you must consider and offer some of our tips and ideas.
Where to begin with your fireplace renovation
If you are a regular reader of Billing Chimneys’ articles, you will know that our first thought with any work to be carried out on a fireplace is safety. It is essential for you and your family that any chimneys and associated appliances are safe to use. The fireplace and especially the chimney flue must be well maintained and in good working order. Because of this, before you start any project it is vital to have the chimney inspected. This is particularly important if you are reopening a fireplace that has been disused as its condition needs to be assessed. An inspection will allow you to find out if there are any problems with the chimney because work may be needed, and this would impact your budget. The system must be in good condition. Problems with brickwork can cause dangerous leaks as will cracked or broken chimney linings. Inspections are easy to arrange and are carried out by Billing Chimneys using state-of-the-art CCTV.
From the start, with any fireplace renovation project, you will need to decide on how the fireplace is to be used. Are you thinking about an open fire or an appliance? Again, this will impact your budget. Changes to the structure of the chimney or a change of appliance will need to comply with building regulations. Therefore, you need to be sure that whoever is carrying out the work is competent and able to comply with all relevant regulations.
By engaging chimney specialists like Billing Chimneys, you can be assured that all work carried out is safe and will comply with all regulations and necessary building control.
Once you’ve had your inspection and any work carried out or if your fireplace is already in use, and you have regular sweeps and inspections, then your project can begin in earnest.
Starting your fireplace renovation project
The fun part of fireplace renovation is in designing the perfect look for your home. If you have moved into a property and want to open a disused fireplace, it can be exciting to find out what might be behind the boarding that has been hiding the fireplace, sometimes for many years. Especially in older properties, this could uncover an unexpected find such as a character fireplace surround which in turn might give you new ideas about how you want the room to look. If you are renovating a fireplace in a period or character home, we have more information here.
You may be changing from an open fire to a wood-burning stove, so you will have the option of redesigning the hearth. You might leave the bricks exposed to give a rustic look or you might want to plaster over them, creating a crisp, clean-looking alcove.
There’s a fantastic range of designs for wood burners and another option could be a double-sided stove. This works where two rooms share a chimney, and the stove is shared between the two rooms.
It is worth considering the fact that an open fire is 20% efficient at heating the room/property, whereas an enclosed freestanding stove is 80% efficient.
Fireplace renovation on a budget
There are ways to carry out a fireplace renovation on a budget. However, we would strongly advise to never cut corners when it comes to safety. A budget option is to simply change the mantle. We don’t mind repeating that is imperative for the safety of you and your family that the chimney is swept and in good condition and this must be a consideration when beginning your project. Once you have had the inspection, you will know whether any work needs to be carried out and any costs involved. Billing Chimneys engineers have many years of experience between them and would be happy to offer some ideas for your renovation, including less expensive options, such as keeping bricks bare and installing a new mantle.
Can I carry out fireplace renovation myself?
Yes, you can, though as we said earlier, having the chimney professionally inspected first is most important. Also, if you are planning structural changes or changes to the appliance, then these works come under building regulations. If mistakes are made, they could be costly to remedy, but most of all, unsafe. You will also need to pay for all costs associated with building control.
Of course, decorative work can be done by yourself and for many, this is the fun part.
Checklist for fireplace renovation
Renovating a fireplace can be an exciting project that makes a big impact on your home. To get the most from it and ensure all runs smoothly, planning is key. Here’s a checklist to help you along.
- Decide what you want to do with the fireplace, for example, a wood burner or an open fire.
- Decide what you want the fireplace to look like.
- Have you removed any boarding up of the fireplace to look behind/up the flue?
- Engage an experienced chimney specialist, like Billing Chimneys, to carry out a sweep and inspection
- If planning to have an appliance, research the types and sizes best suited for your room and seek the advice of your chimney specialists
- Set your budget
- Book your installation
- Complete your decoration
- Light the fire
- Sit back and enjoy your beautiful fireplace.
A fireplace is the centrepiece of any room and with careful thought, your fireplace can create a beautiful talking point. With a multitude of options, fireplace renovation makes for a great project with safety at its core.